 It may still be the dead of winter, but now is a good time for industrial facilities to perform a preseason chiller system inspection. This blog post will help you avoid having to utilize expensive emergency backup services by properly checking all motors before the cooling season.
Keeping critical operations running
In the warm summer season, cooling equipment operates at near peak capacity. If that equipment is used for critical building functions, equipment downtime isn’t an option.
For example, hospitals rely on central cooling systems for critical patient care areas, such as operating and emergency rooms. Another scenario involves cooling data centers, which are full of servers that contain sensitive information.
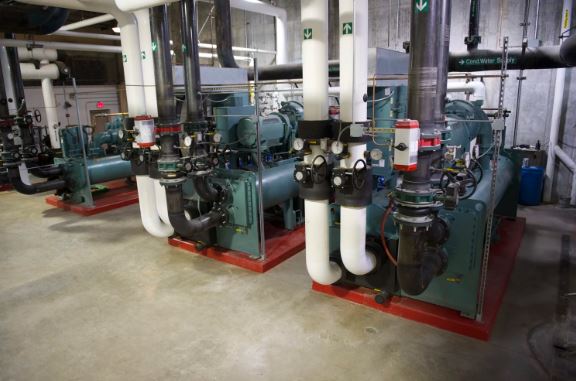
The chilling process is often accomplished with water chillers, pumps and cooling towers, all of which use three-phase motors to move water and air or compress refrigerant.
Several diagnostic tests should be run on chiller systems before seasonal startup, but none is more important than checking motor insulation resistance. An insulation tester will pass high voltage through the individual motor windings while measuring the winding resistance. A low resistance indicates the winding is deteriorated and might fail after the device is put into service.
Using an insulation tester
In general, using an insulation tester involves the following steps:
- Wear personal protective equipment (PPE) as a safety best practice. It’s especially important for you to wear safety glasses. Additionally, be sure to disconnect and remove all power sources to the motor before attempting any type of repair. This means following lockout-tagout procedures. Double check by using a multimeter to ensure all power is shut off.
- Remove the screws that hold the wire connection cover in place from the motor and set them aside. Next, detach the power wires from the motor wires. (You might have to identify the pairs with labels or numbers, so you can maintain proper rotation. This is especially true for three-phase motors.) The device must be at room temperature for a minimum of 24 hours before you run the test, and make sure the motor is not in a vacuum when the insulation testing is done as this could damage the motor.
- Attach one lead of the insulation tester to one of the motor wires and the other to the motor ground or metal case, and then turn on the meter or crank the handle. The meter’s manufacturer should have reference readings for each motor. Generally, a reading above 20 to 30 megohms should be sufficient to run most motors. A lower reading might indicate deterioration of the winding insulation.
- Test each motor winding in turn and record each set of windings per the megohm reading. Quality insulation testers will have the ability to log the data to a mobile device for future reference. If there is ever a very low reading, the motor should be replaced as this could result in a high amperage draw or blown fuses. Many manufacturers will provide a chart with the proper readings.
Ultimately, always be sure to follow the manufacturer’s device and meter recommendations.
Conduct a chiller system inspection on all motors
If a motor fails, it could cause the entire chiller system to fail, which is why these inspections are necessary. By acting in the preseason, you’ll identify problems in time to fix them.
This blog post was drafted in partnership with Fluke Corporation. Check out Fluke’s original article, “How to perform preseason checks on your chiller system.”
Related posts
Vibration sensors detect faults, minimize equipment downtime
Infrared preventive maintenance monitors critical equipment temperature