 Check out the following steps on how to properly crimp your copper connectors. You can also follow along by watching the video.
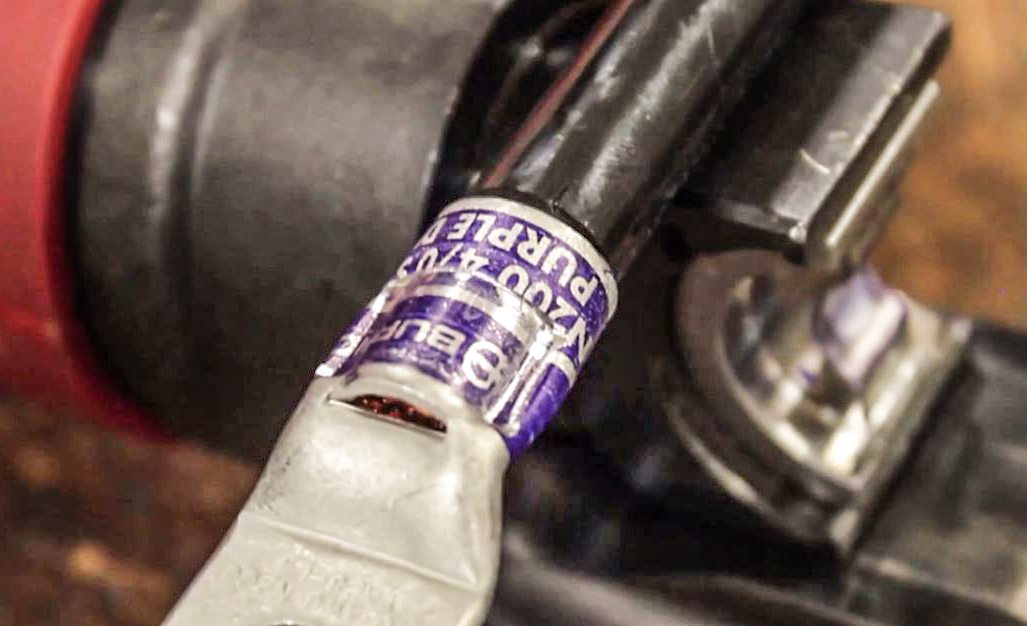
Step 1: Make sure your connector and conductor have the same markings.
BURNDY® connectors accommodating copper Class B (concentric, compressed and compact) or Class C wire will have thick, solid ink color-coded bands with knock-out lettering on the connector barrel. BURNDY® connectors accommodating copper Flexible Class G, H, I, K, M, DLO wire will have ink lettering and narrow bands that are color-coded.
Check out BURNDY® copper lugs and other products at Border States.
Step 2: Measure the right strip length, line up the connector barrel to the wire, and mark the cable.
Strip the cable to the needed length with a wire stripper, or a similar tool, to strip the insulation. Strip the insulation carefully to avoid nicking or cutting conductors. Wire brush as required. Strip the insulation to the proper length so the conductor can be fully inserted into the connector barrel.
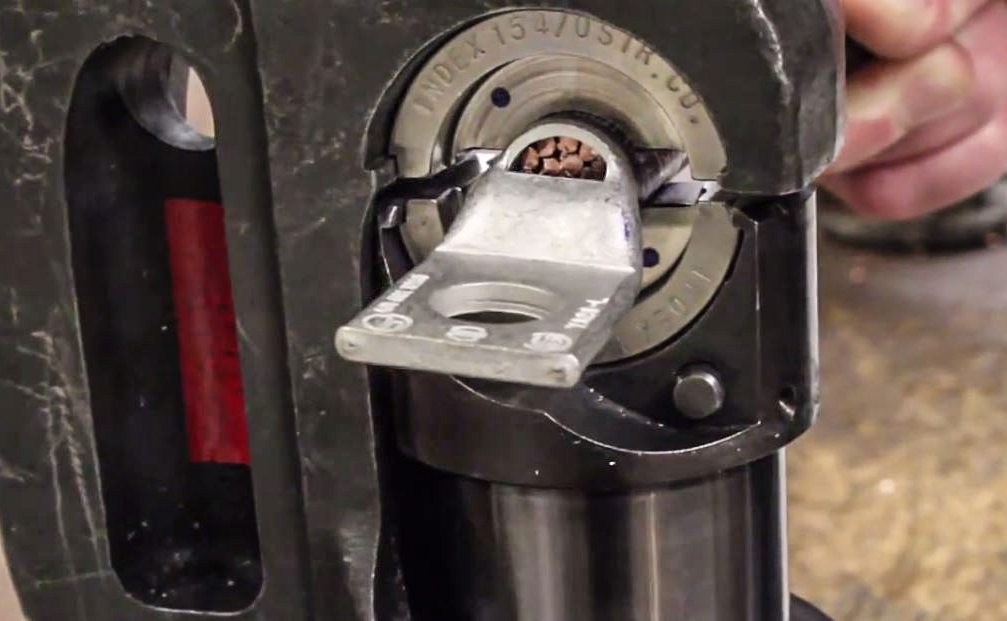
Step 3: Select the appropriate die set to match the installation tool.
The die index number and color code indicated on the connector should match when the correct die is chosen.
Step 4: Insert the dies into the tool
Step 5: Insert the conductor fully into the connector barrel.
If an inspection window is provided, the conductor-in can be easily seen.
Step 6: Place the connector between the installed dies.
Use the color bands as a guide for crimp placement. Refer to master catalog pages for the required number of crimps, which depends on the tool and die selected.
 Step 7: Begin the tool’s crimping cycle, and continue until the full cycle is complete.
Be sure to always crimp from the tongue end to the conductor end. Release ram and repeat the process until all crimp locations on the barrel have been completed.
Step 8: Once all crimps have been completed, the connection is ready and can be inspected for proper installation.
The embossment made by the die should match that on the connector.
Step 9: Inspection
Ensure the correct number of crimps were made and the die index embossment matches the die index on the connector markings. The orientation of the crimp is not critical on a seamless barrel.
The standard practice for medium and large terminals is not to alternate the crimp direction. However, doing so wouldn’t affect the integrity of the connector or resulting connection.
Have questions about BURNDY® products? Contact a Border States account manager today.
RELATED: Border States offers BURNDY® FASTAP™ as quick, safe solution for tapping distribution lines