To optimize safety and effectiveness when working with high-voltage power lines, linemen must know how to properly test tools such as hot sticks.
Here are some important steps to take before working with energized lines:
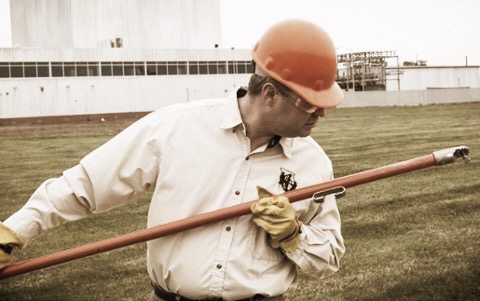
Do a visual inspection
All hotline tools should be wiped clean and visually inspected before each use, per OSHA guidelines. Certain defects or contamination could affect the insulating qualities or mechanical integrity of tools.
Review the surface of the insulated pole for:
- Scratches, gouges, cracks, cuts, nicks and dents
- Dull finish, excessive wear and delamination
- Signs of electrical tracking, burn marks or blistering
Inspect end fitting and other mechanical parts for:
- Proper operation
- Cracks, bending or other visible damage
- Excessive wear
Listening to your instincts is key. If there’s any question regarding a tool’s integrity, that tool should be removed from service for further inspection and testing. In some cases, the tool can be refinished or repaired. Always retest after repairs.
Perform periodic maintenance and testing
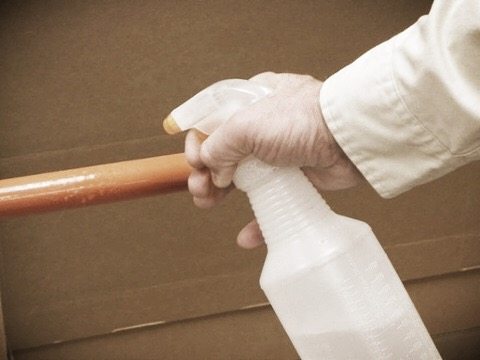
All fiberglass-reinforced product (FRP) tools used for primary employee protection should be electrically tested at least once every two years, per OSHA guidelines. These tools require a wet test at 75,000 volts per foot for one minute. An alternate watts-loss test method, which is performed at lower voltage (2,500 volts minimum), is also acceptable. (Wet tests are never performed on wood tools.) FRP tools should be tested after cleaning, but before applying silicone or wax. These could temporarily mask a defective tool.
Heavily scarred sticks consistently fail wet and dry tests, even after cleaning and applying wax or silicone. It’s important to remember that refinishing will only partially restore surface integrity. It’s also worth noting that, when wet testing, overapplying water can cause false results because of water droplets along the bottom of the stick.
Inspecting gloves is crucial when working with tools
In addition to inspecting hotline tools, it’s also crucial to check the integrity of your gloves. You should know how to clean and inspect your rubber gloves in the field – it could save your life. Watch the video.
[youtube https://www.youtube.com/watch?v=bivd5jimYWM&w=400&h=225]
Gloves are your first line of defense against accidental electric shock, which is why field inspection is necessary prior to every use. Physical damage or a volatile chemical on the rubber can degrade it to the point of offering little to no protection.
During inspection, look for:
- Cracks
- Splits, cuts or holes
- Grooves
- Creases
- Blooms or swells from chemicals
- Punctures
Cracks
The first blemish to look for is checking or cracking. These are caused by UV or ozone exposure. Natural rubber provides excellent electrical protection, but just like car tires, if exposed to elements, it will begin to crack and degrade. Always keep your gloves in approved storage containers.
Splits, cuts or holes
Splits, cuts or holes are blemishes you should always be on the lookout for. These can be caused by wood splinters, cable ends, tool edges and more.
Grooves
Grooves usually occur because of rope burns or heat exposure. It’s important to make sure your leather protection gloves are fully intact, to help avoid damaging your rubber gloves.
Creases
Creases are usually caused by leaving the glove inside out for too long, or storing it while it’s folded in an unnatural way. It’s important to always store your gloves with the cuffs beaded side out to help avoid creases.
Blooms or swells from chemicals
Blooms or swells from chemicals are often caused by chemical or oil exposure. Any petroleum-based product can cause this reaction, including inhibitors, hydraulic fluids and transformer oils. It’s important to instantly wipe off all chemicals and oils. If left, your gloves will absorb the oils, and even though the swelling will disappear, the integrity of the gloves will be compromised.
Punctures (field inflation is vital)
Follow these steps to inflate your glove properly in the field, listen for leaks, and check the interior for punctures:
- Grasp your gloves at the edges.
- Stretch the bead and roll the bead over onto itself.
- Place the glove against the body and begin to roll the bead toward the fingertips. While doing this, continue to press down firmly to keep the air in the glove.
- Listen for leaks. This is important because with a very minor hole, you can only locate it with this inflation method. The hole could allow electricity through.
- If no leaks are found, release the air and turn the glove inside out. Be sure all the fingertips are fully turned before you start inflation, so they won’t pop out during the bead roll and not allow high-enough pressure to build within the glove.
- Repeat the listening for leaks process described earlier for your glove interior.
This should be done before each use of your gloves, and always wearing gloves is vital for your safety. Your safety is paramount, so be sure to always be mindful of the integrity of your hotline tools.
This blog post was drafted in partnership with Hubbell Power Systems. Click here to see their original post, “Are you Properly Testing Your Hot Line Tools?“